

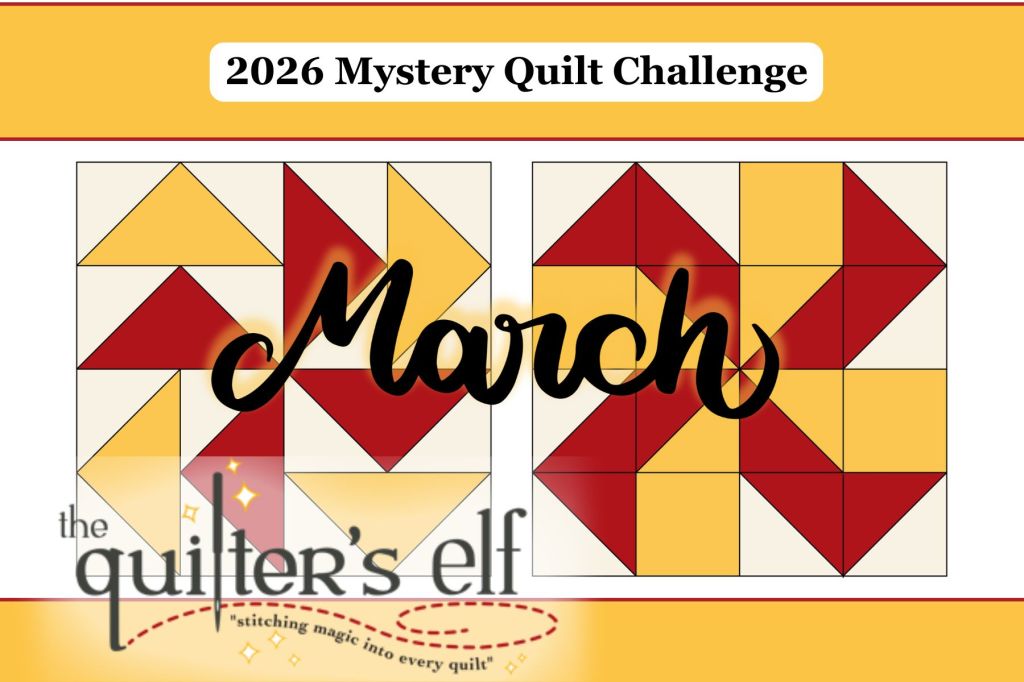
From the 2026 Sew Flake Mystery Quilt Challenge
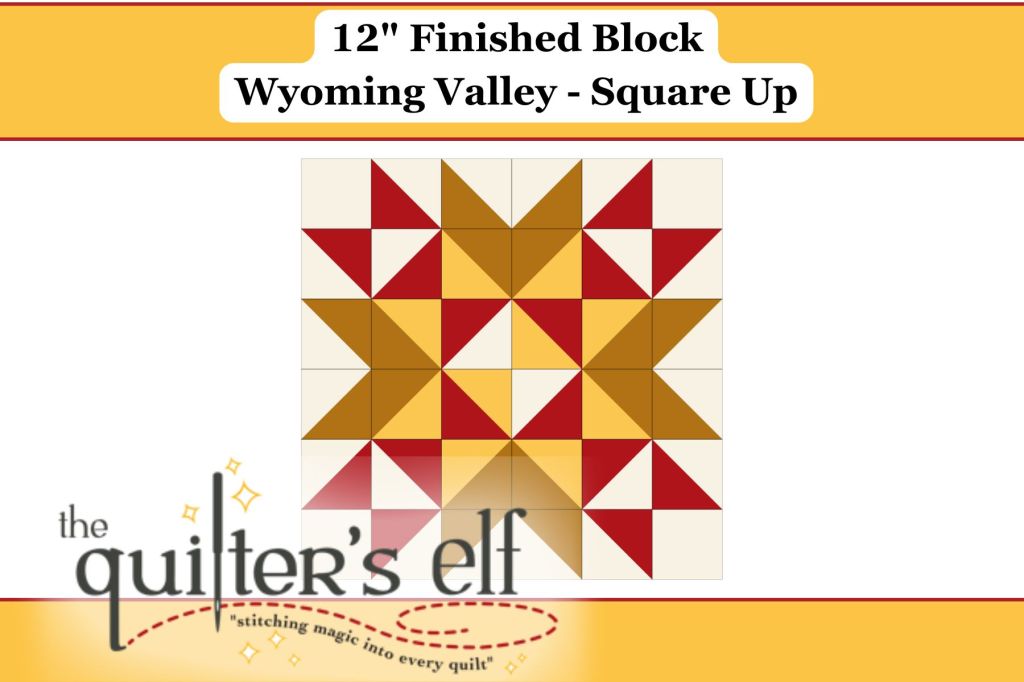
February Block Two (Option A): Wyoming Valley
Instructions by Julie. Posted by Tia. (See PDF copy)
Term Definitions:
- HST = Half square triangles
- Scant ¼” = About a thread or needle width narrower than a regular quarter inch. Move your needle position one or two clicks to the right. Use a scrap piece of fabric and sew a scant ¼”. Make sure it measures correctly. This should be slightly less than a ¼”.
- Stitch length = the number of stitches per inch. Standard seaming is 2.5. When piecing it is recommended to use a 2.0. Find your machines stitch length and turn to 2.0.
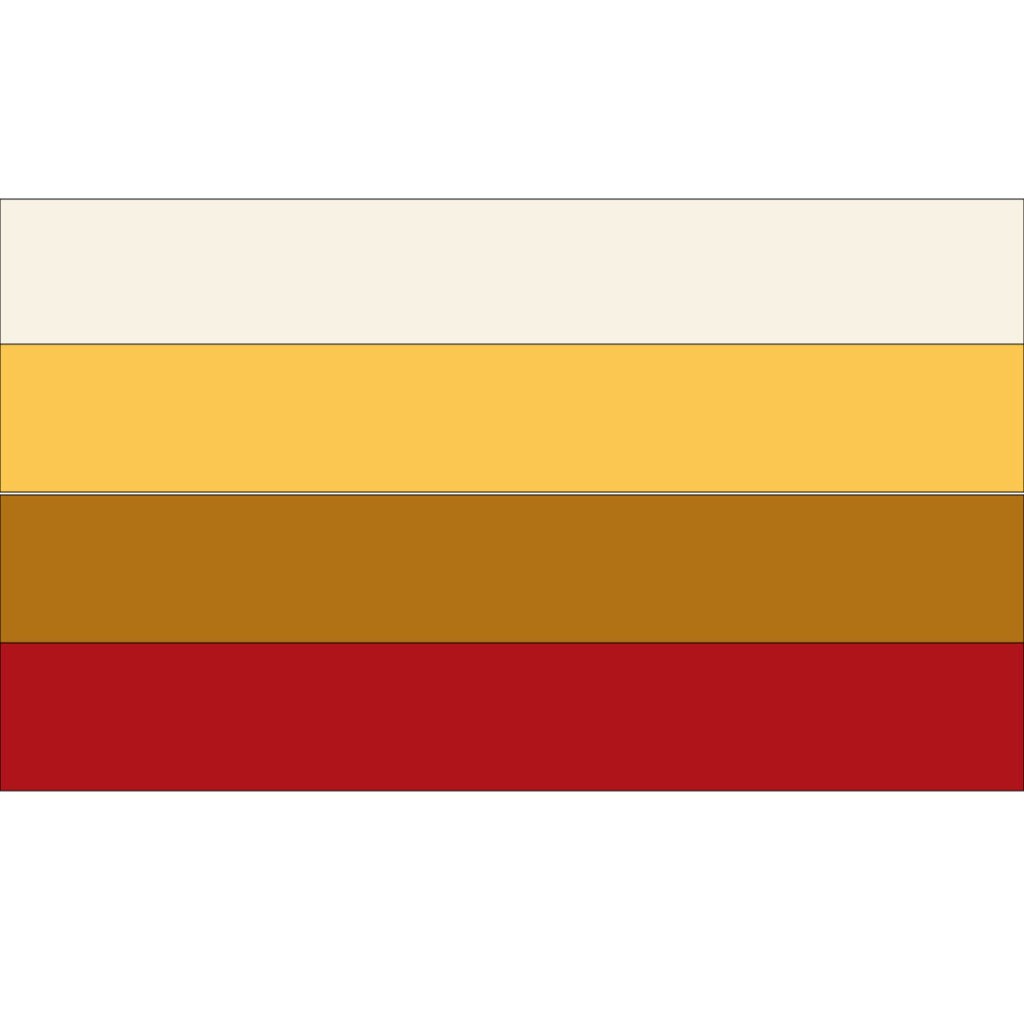
You will need 4 Fabrics:
- 1 Background Fabric
- 1 Light Fabric
- 1 Medium Fabric
- 1 Dark Fabric
Hint: Use the blank block diagram and assign your fabric choices to each area. You can write the choice in, or you can paste a small clipping of fabric into the area. This will help you when you are cutting each section.
1 – Cut:
- Background Fabric:
- Cut (1) strip 2.5” x 10” then Sub Cut (4): 2.5” X 2.5“ squares.
Keep these squares separate from the other squares you will be cutting - Cut (1) strip 2 7/8” x 33” then Sub Cut (11): 2 7/8” x 2 7/8” squares
- Cut (1) strip 2.5” x 10” then Sub Cut (4): 2.5” X 2.5“ squares.
- Light Fabric:
- Cut (1) strip 2 7/8” x 16” then Sub Cut (5): 2 7/8” x 2 7/8”
- Medium Fabric:
- Cut (1) strip 2 7/8” x 25” then Sub Cut (8): 2 7/8” x 2 7/8” squares.
- Dark Fabric:
- Cut (1) strip 2 7/8” x 25” then Sub Cut (8): 2 7/8” x 2 7/8” squares
2 – Square Assembly:
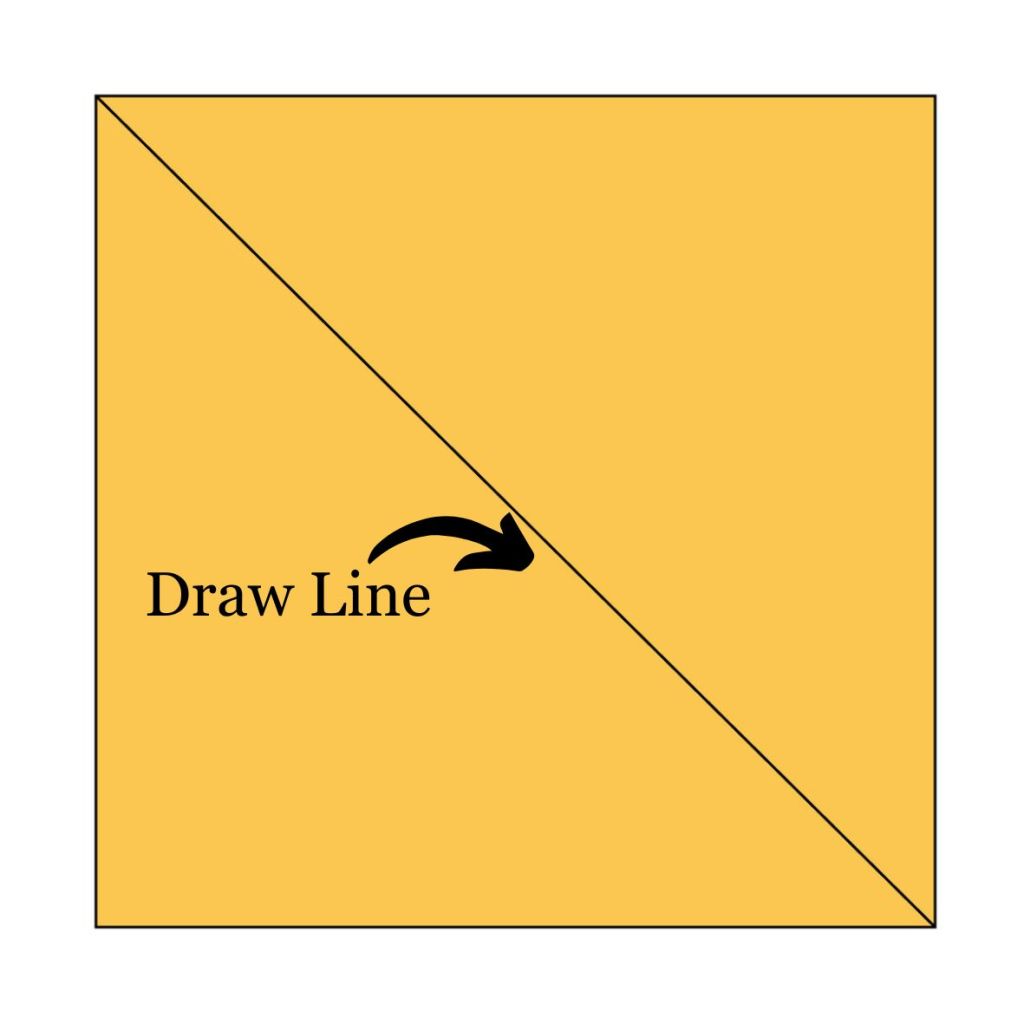
- Mark all of the 2 7/8” background fabric squares with a diagonal across the back. This should be done with a light pencil or a removable fabric type of marker. Frixion pens work well.
- Mark all of the 2 7/8” light fabric squares with a diagonal across the back. Lay your medium and dark colored fabric squares with the background fabric, right sides together.
- You should have 1 dark and 4 medium squares remaining. These squares are placed right sides together with the 5 light colored squares.
You should have:
- 7 pairs of dark with background HST
- 1 pair of dark to light HST
- 4 pairs of mediums with background HST
- 4 pairs of mediums to light HST
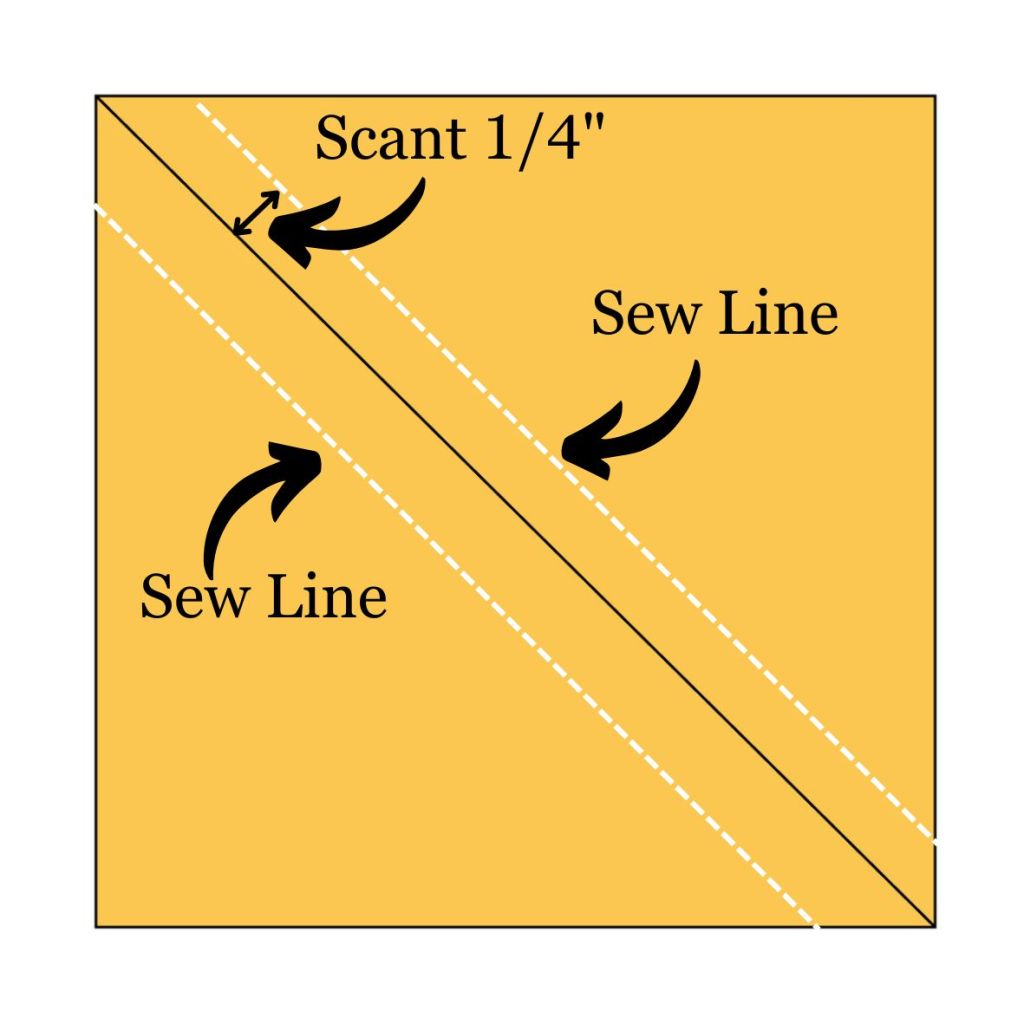
3 – Sew: Use the diagonal mark and sewing a scant ¼ inch on each side of the mark. This creates two HST units. Chain piecing works well in this step to make two lines on each pair of squares.
4 – Cut HST: When sewn, set your seams. Cut the squares into HST by cutting through the solid marked line. Each sewn square creates 2 HST that should measure 2 ½”
You should have:
- 14 dark with background HST
- 2 dark to light HST
- 8 mediums with background HST
- 8 mediums to light HST
5 – Press: Press the seams to the darker fabric side. (You can choose to press your seams open.)
6 – Square Up: To “square up” your HST, place a quilting ruler over the unit so the 45-degree diagonal line on the ruler perfectly aligns with your sewn seam. Trim the edges so the unit measures exactly 2.5” x 2.5”. This ensures all your points will line up perfectly when you sew the block together.
- Need a Visual? If you are new to this technique, search “how to square up a half square triangle” online for a quick video demonstration to see it in action.
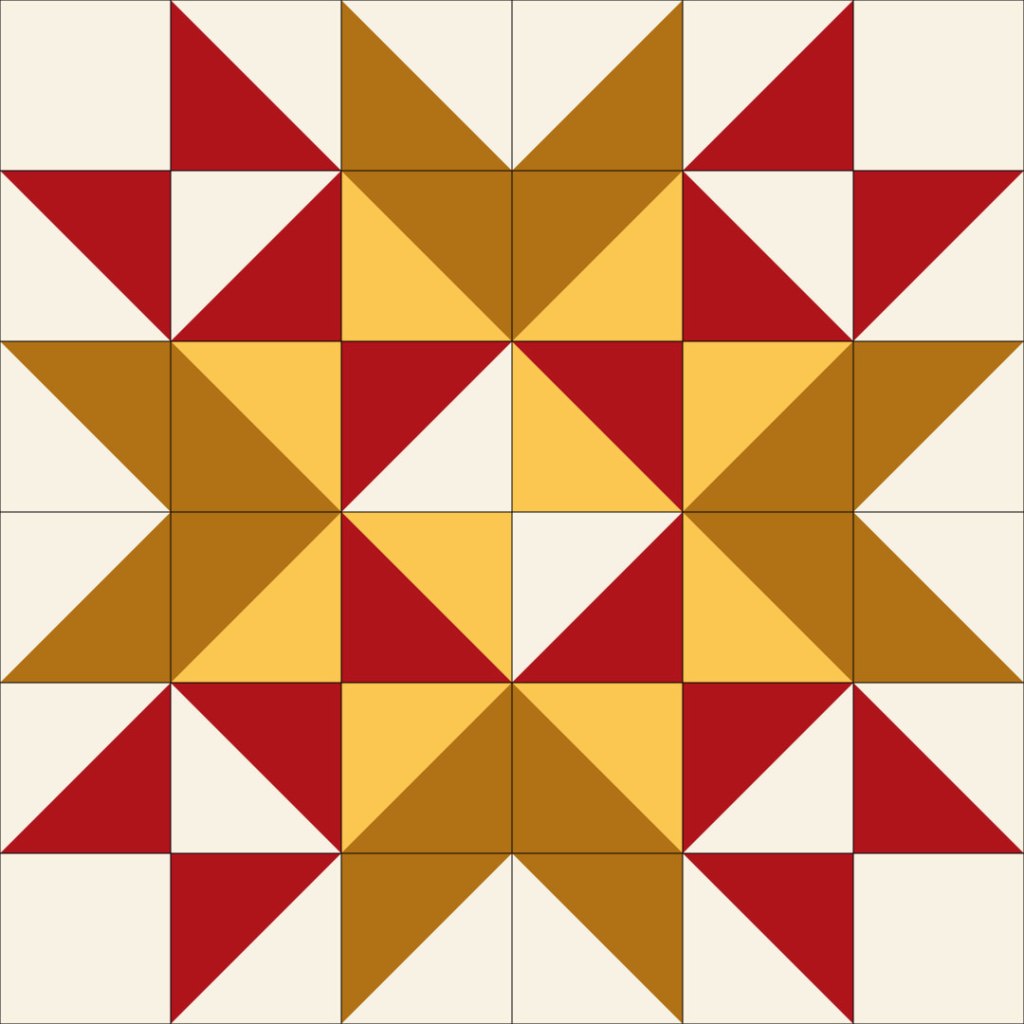
7 – Arrange: Using your block diagram, arrange your HST to match the block shown. This is where you will also use the 2 ½ inch background squares you put aside.
8 – Sew: Sew your units as shown in the diagram. Remember to set your seams.
9 – Complete: Your completed block should measure 12.5” square.
Step by Step Tutorials:
- Alternative Instructions: The Sewcial – Wyoming Valley
- Alternative Instructions: Fairfield World – Wyoming Valley
- Video: The Quilted Forest – Wyoming Block
- IMPORTANT: The video and alternate instructions use different measurements. Ignore the numbers! Please stick to these instructions to get our large 12.5″ block.


Leave a comment