
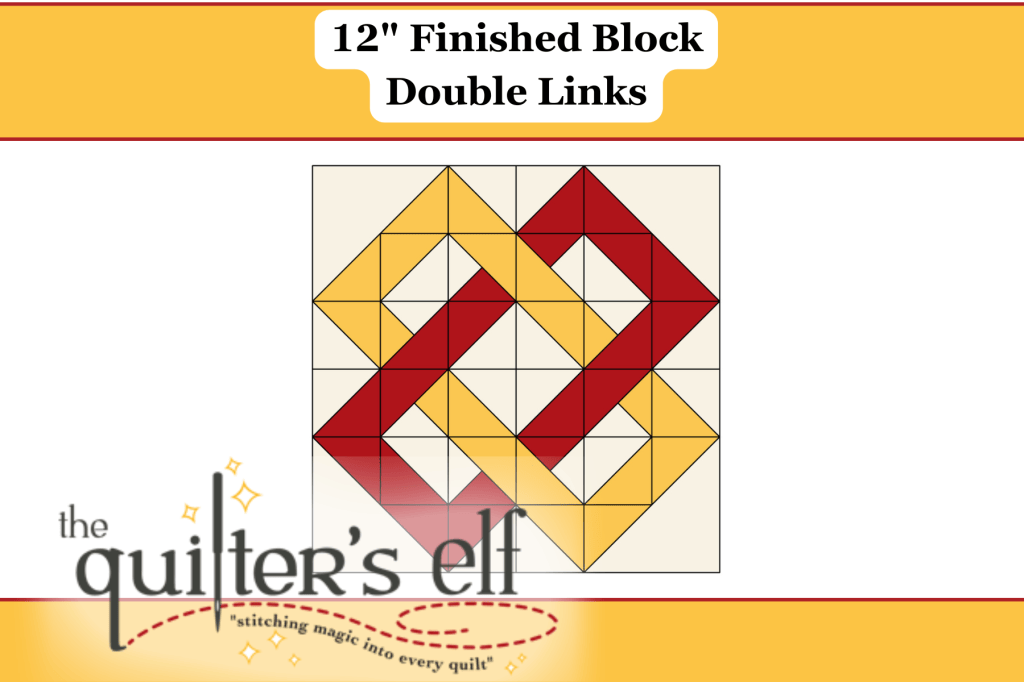
From the 2026 Sew Flake Mystery Quilt Challenge
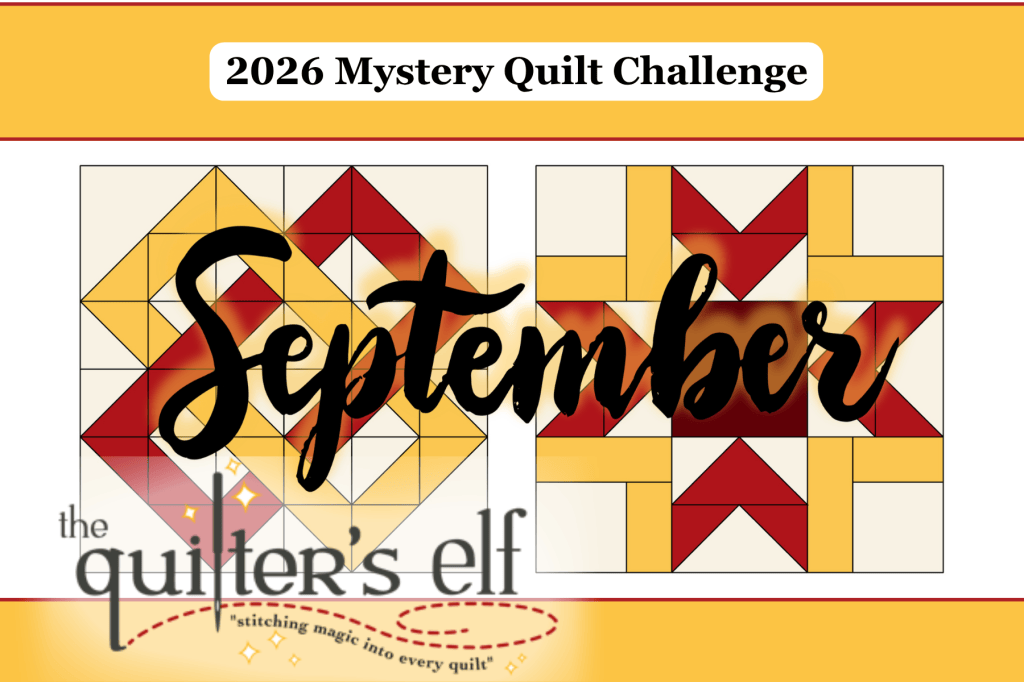
September Block Two: Double Links
Instructions by Julie. Posted by Tia. (See PDF copy)
Julie’s Note: This block itself isn’t too difficult to assemble.
You will need 3 Fabrics: Use the Coloring Diagram as needed.

Julie’s Note: When all these pieces are cut, they are very similar in size. Here is what I recommend that you do. Cut all your pieces, but do not Sub Cut. As you cut, use post-it notes with the size cut. Keep all the cut blocks in a stack with the note of the cut size. After cutting all the blocks, go back and Sub Cut and keep the pieces in their marked stack. This will be extremely helpful when you start to assemble the block.
Step 1 – Cut:
- Background Fabric:
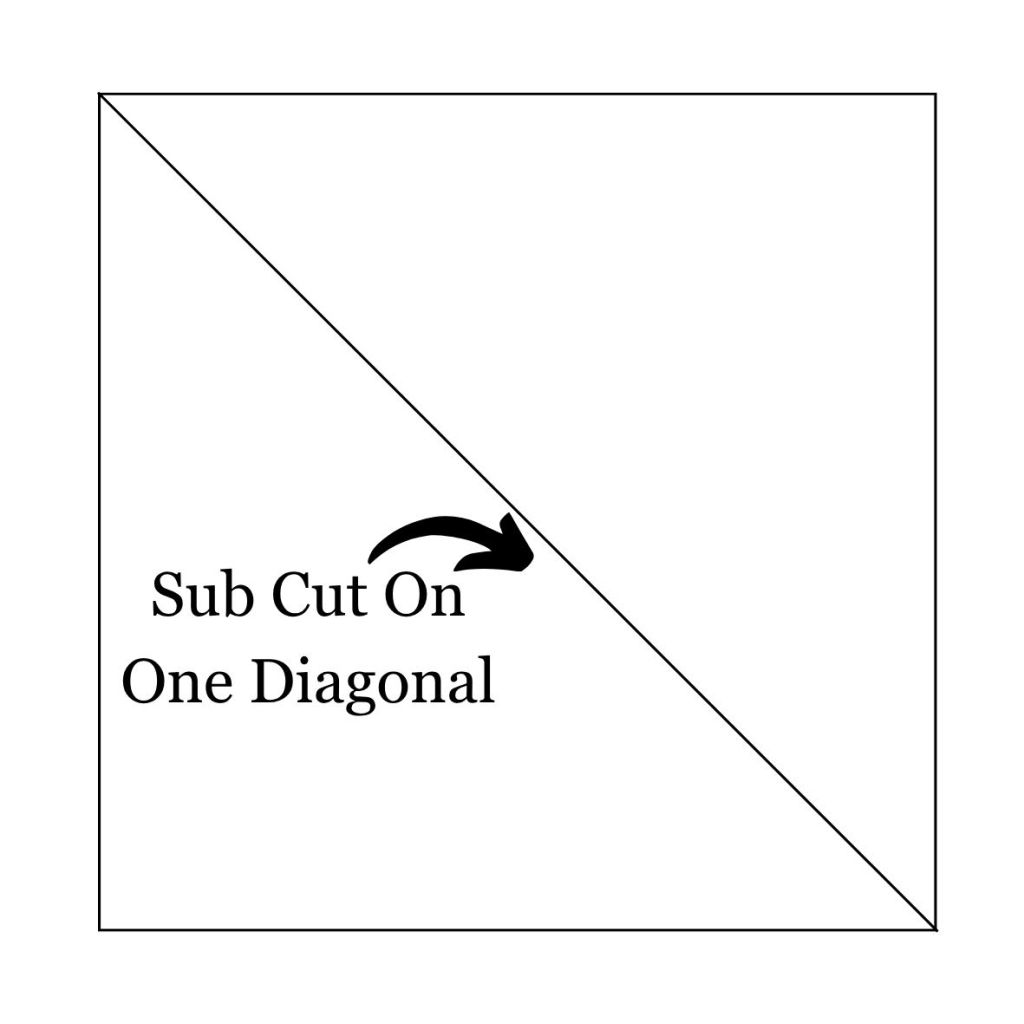
- Cut (8) 2 7/8” squares then Sub Cut on one diagonal
- Cut (2) 4 7/8” squares then Sub Cut on one diagonal
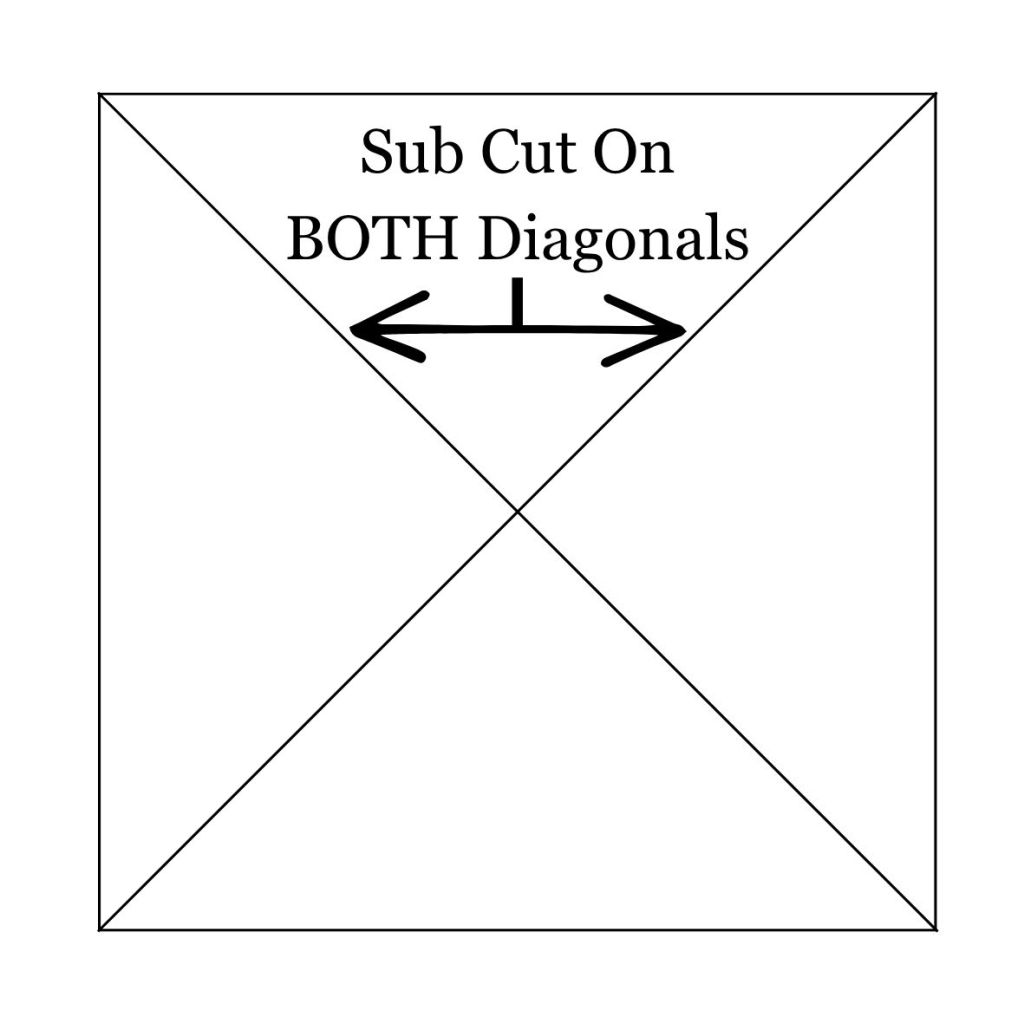
- Cut (2) 3 1/4” squares then Sub Cut on BOTH diagonals
- • Light Fabric:
- Cut (8) 2 7/8” squares then Sub Cut on one diagonal
- Cut (1) 3 1/4″ square then Sub Cut on BOTH diagonals
- Medium Fabric (or Dark):
- Cut (8) 2 7/8” squares then Sub Cut on one diagonal
- Cut (1) 3 1/4” square then Sub Cut on BOTH diagonals
Julie’s Note: This block uses 1/4” seams.
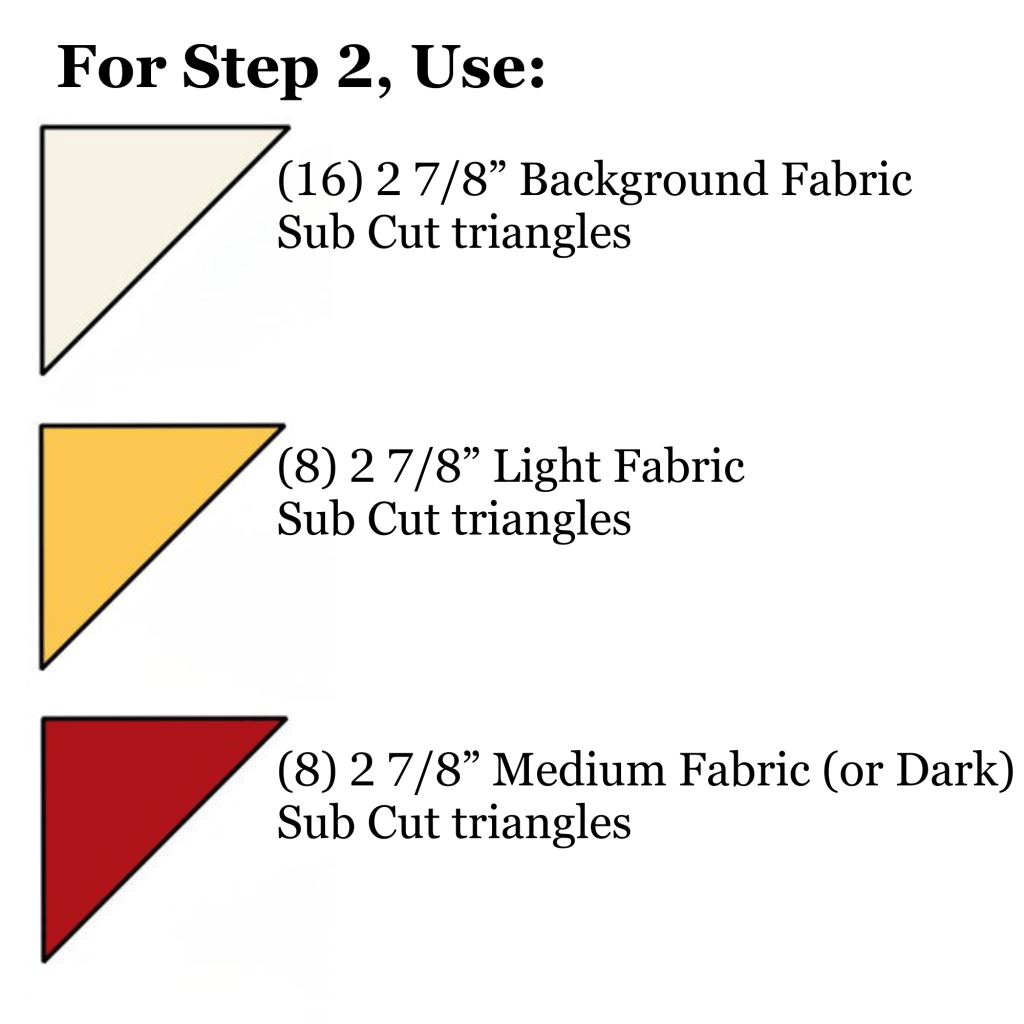
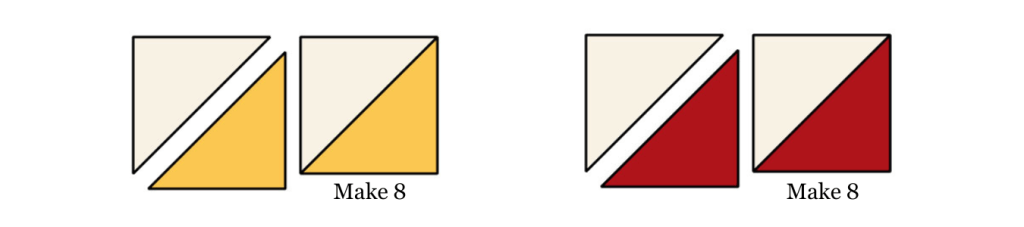
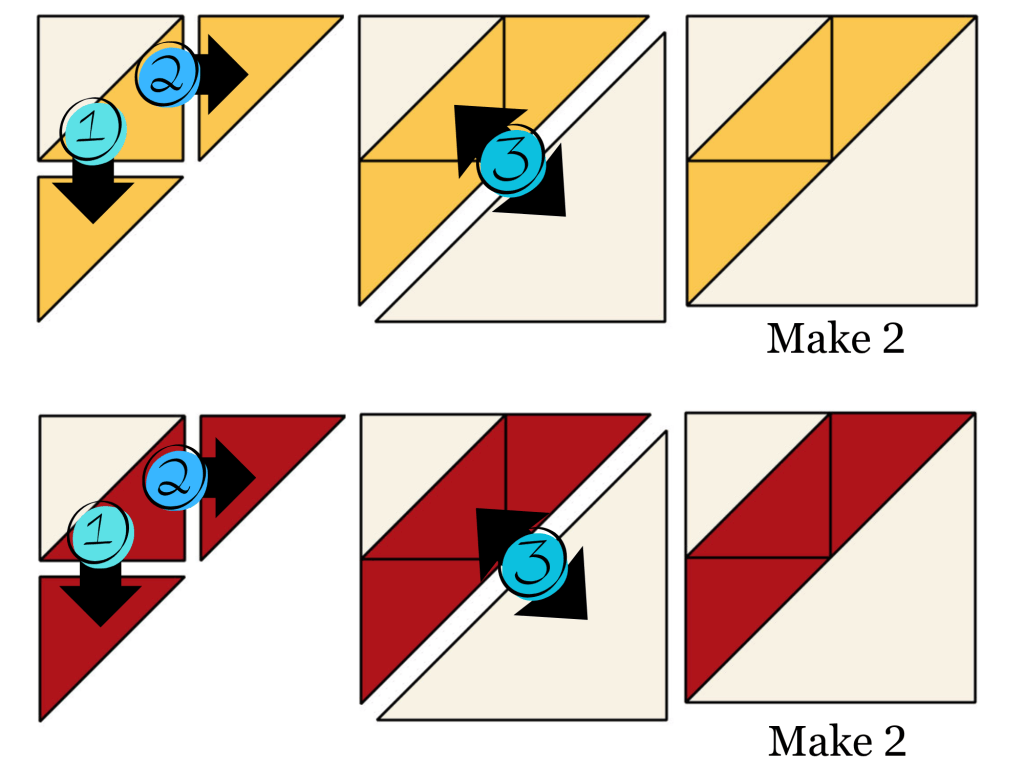
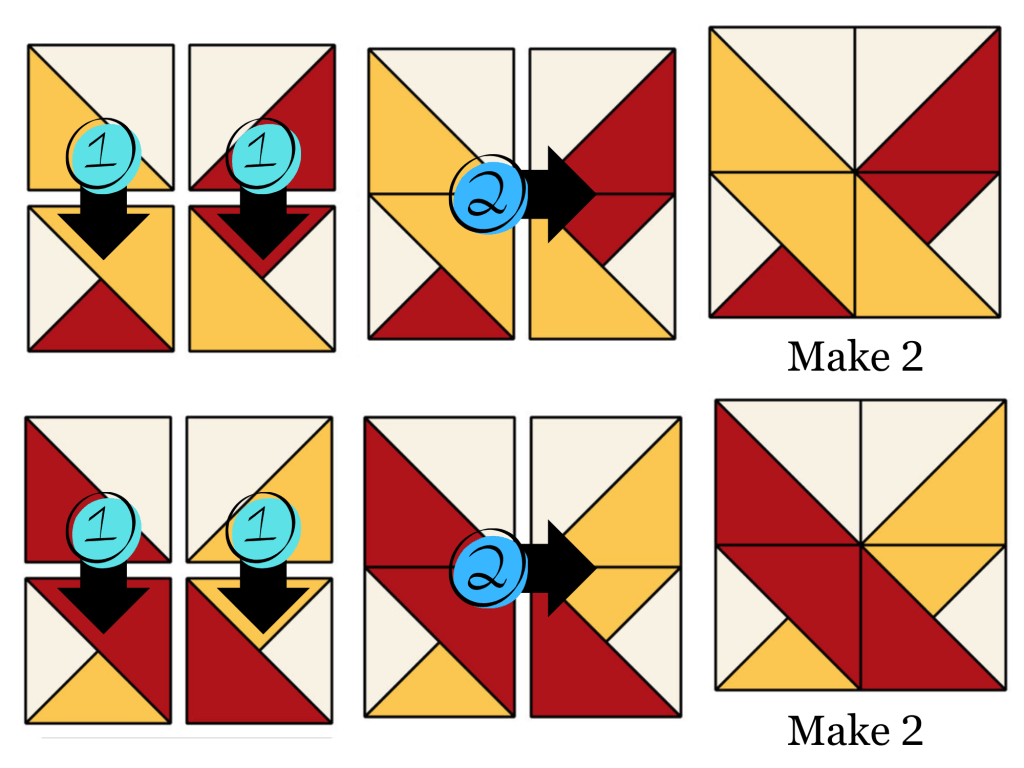
Step 2 – Make 2 1/2” HST Squares: Assemble two sets of (8) as shown in the diagram: (8) Light Fabric HSTs and (8) Medium Fabric (or Dark) HSTs. Set your seams and press. Trim the 1/4” tips from the finished squares. The finished HST Squares should measure 2 1/2” square
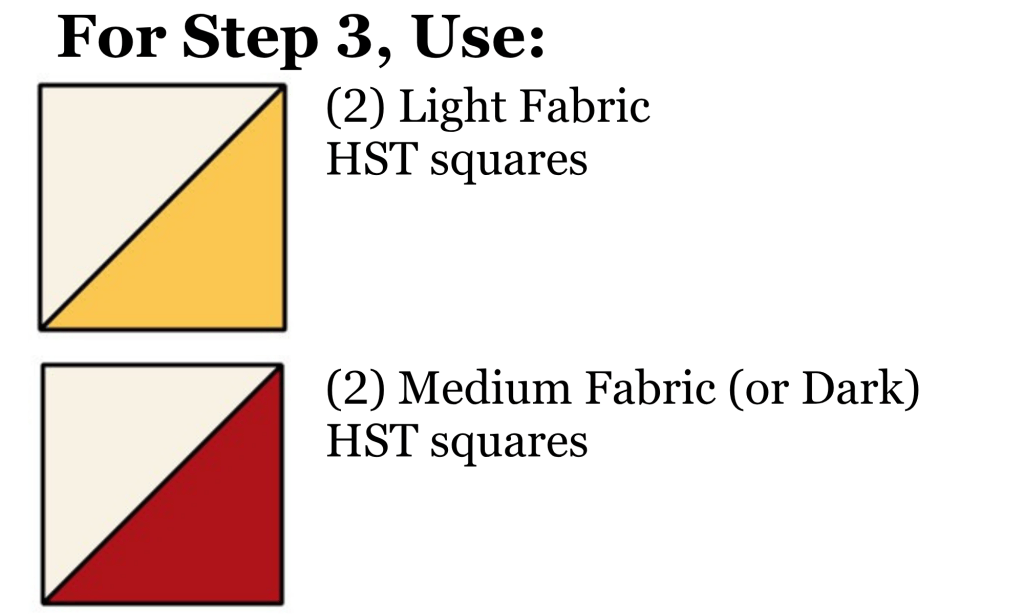
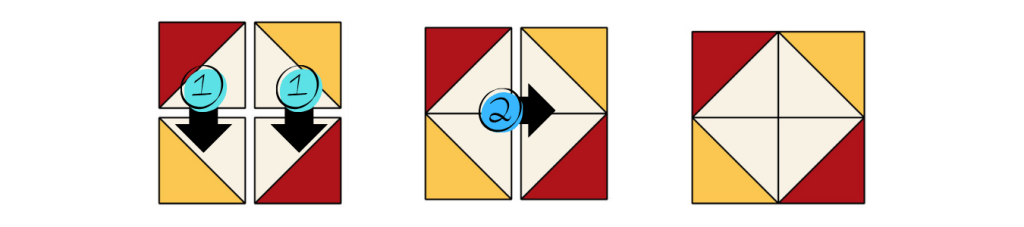
Step 3 – Make Center Block: Assemble the block as shown in the diagram using the squares from step 2. Set your seams and press. The finished Center Block should measure 4 1/2” square.
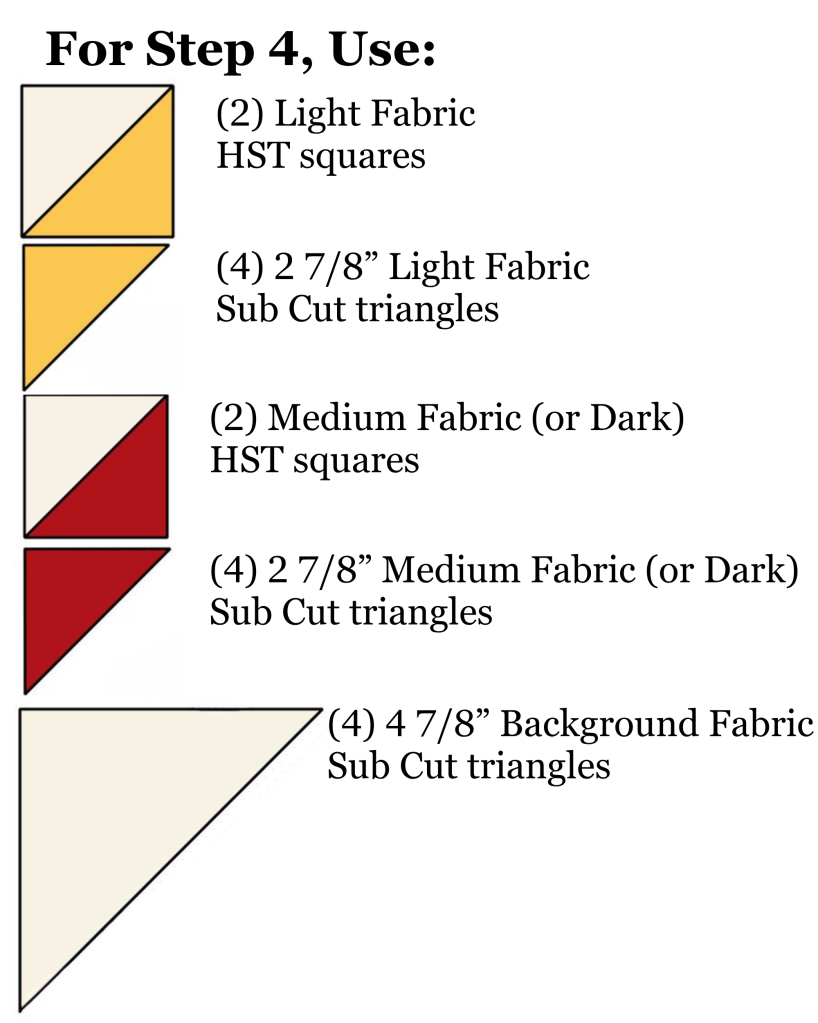
Step 4 – Make Corner Blocks: Assemble the Corner Blocks as shown in the diagram below. Set your seams and press. Trim the 1/4” tips from the finished squares. The finished Corner Blocks should measure 4 1/2” square.
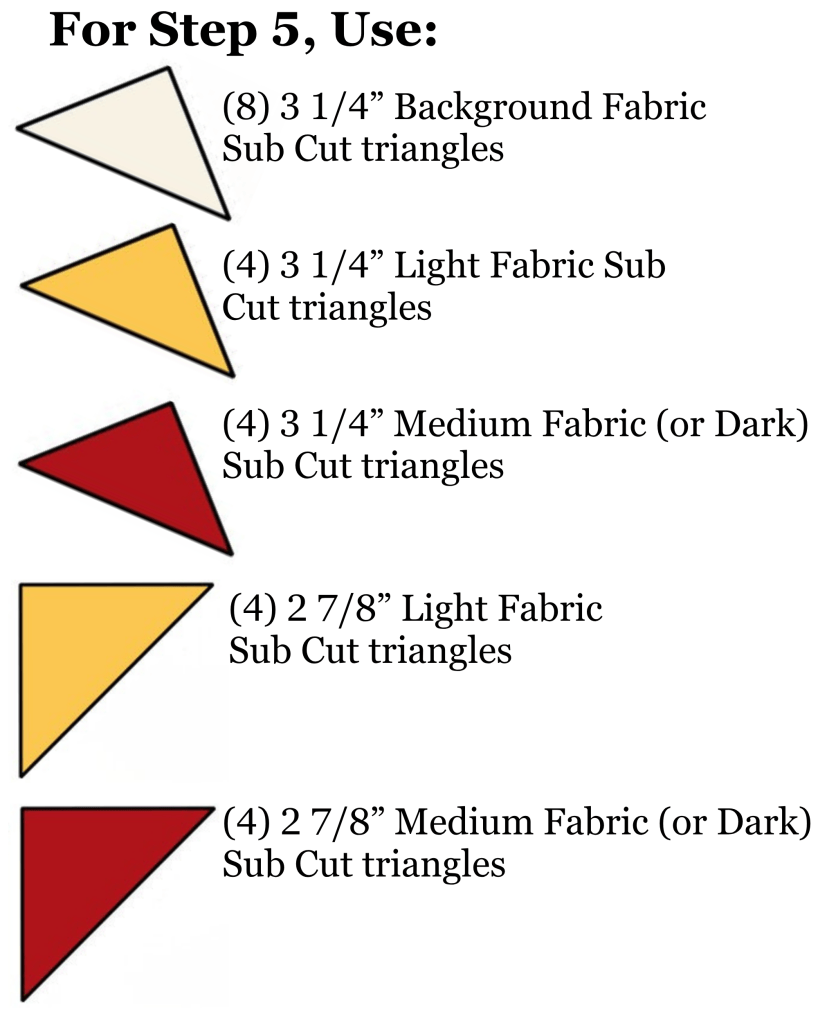
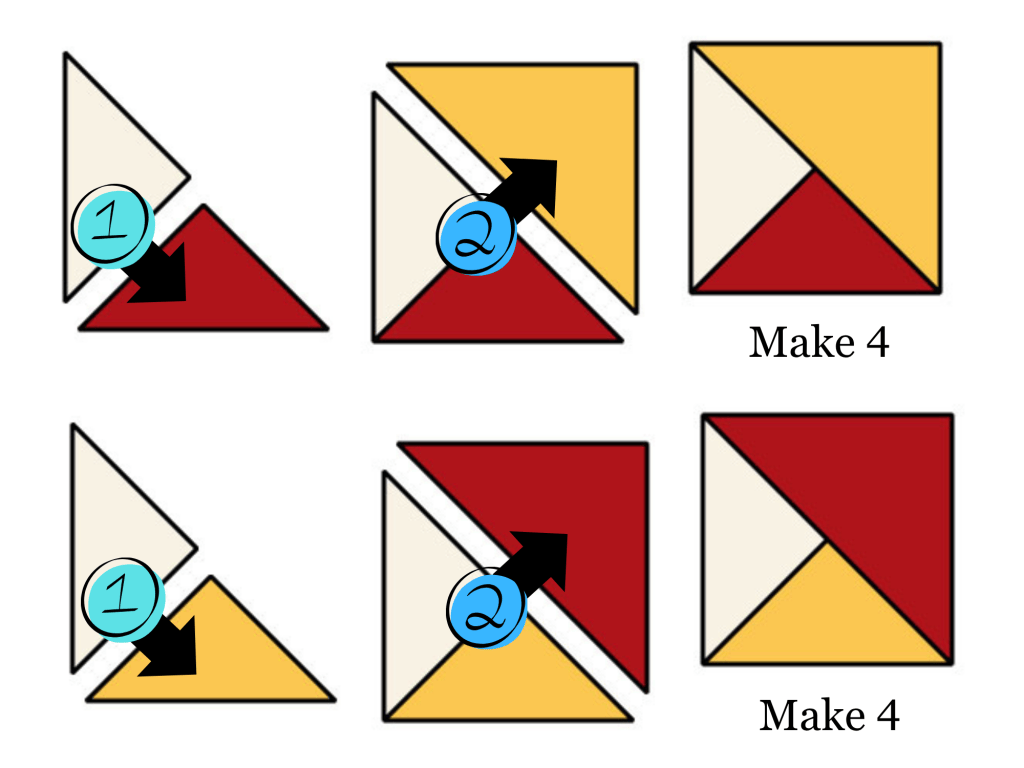
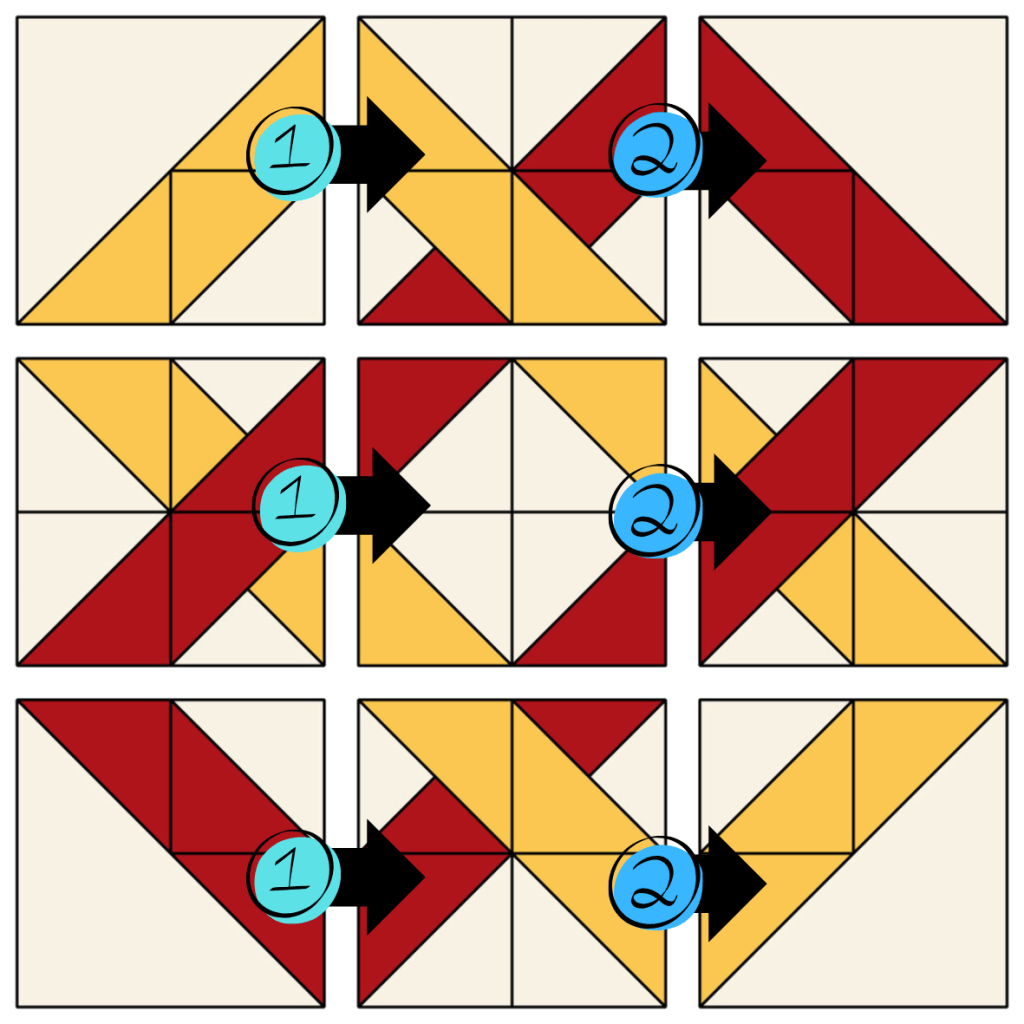
Step 5 – Make Tri-Squares: Using the 3 1/4″ Sub cut Triangles, sew the two smaller triangles together as shown in the diagram.
Using the 2 7/8″ Sub Cut triangles complete the block as shown in the diagram below.
Set your seams as you go and trim the 1/4″ tips from your blocks. The finished squares should measure 2 1/2″.
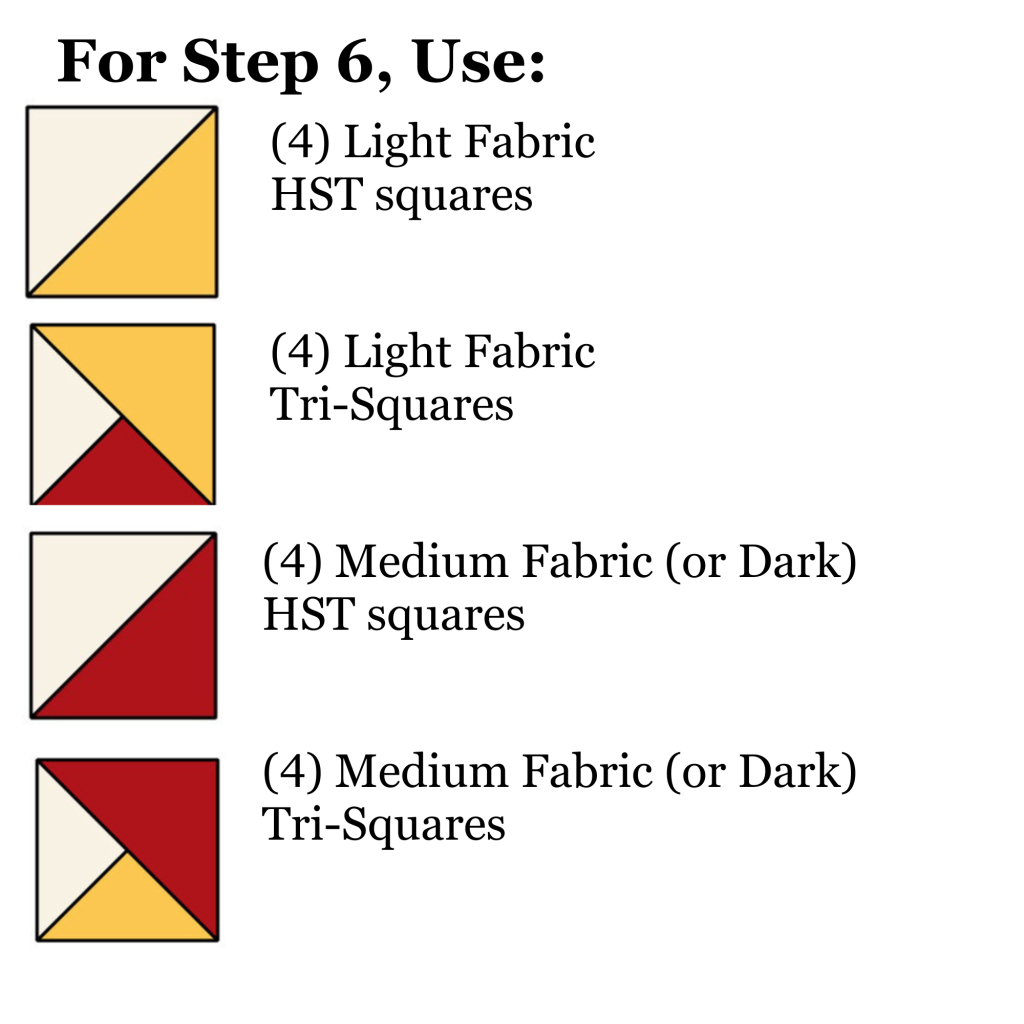
Step 6 – Make Linked Blocks: Assemble the blocks as shown in the diagram below. Set your seams and press. The finished Linked Blocks should measure 4 1/2” square.
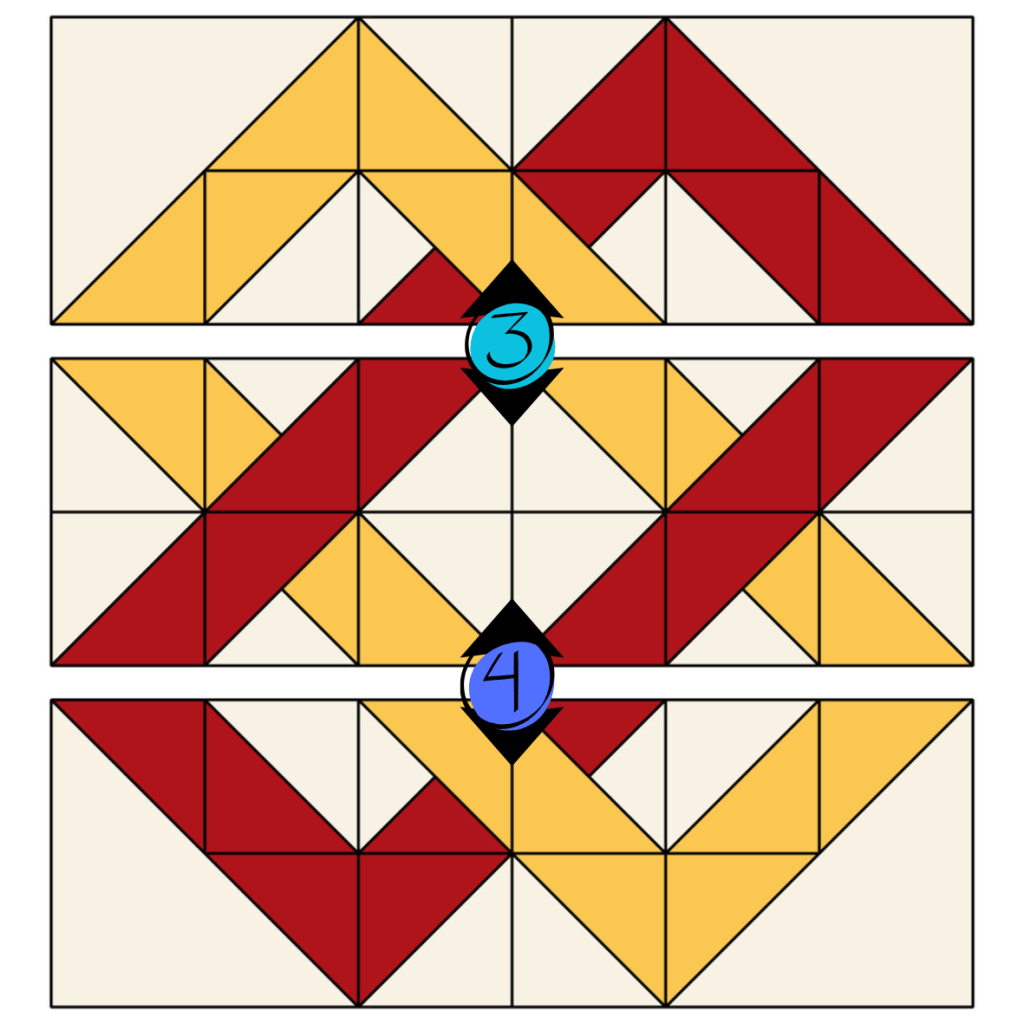
Step 7 – Arrange: Arrange (1) Center Square, (4) Corner Blocks, and (4) Linked Blocks as shown in the diagram. Sew together in order shown in the diagram.
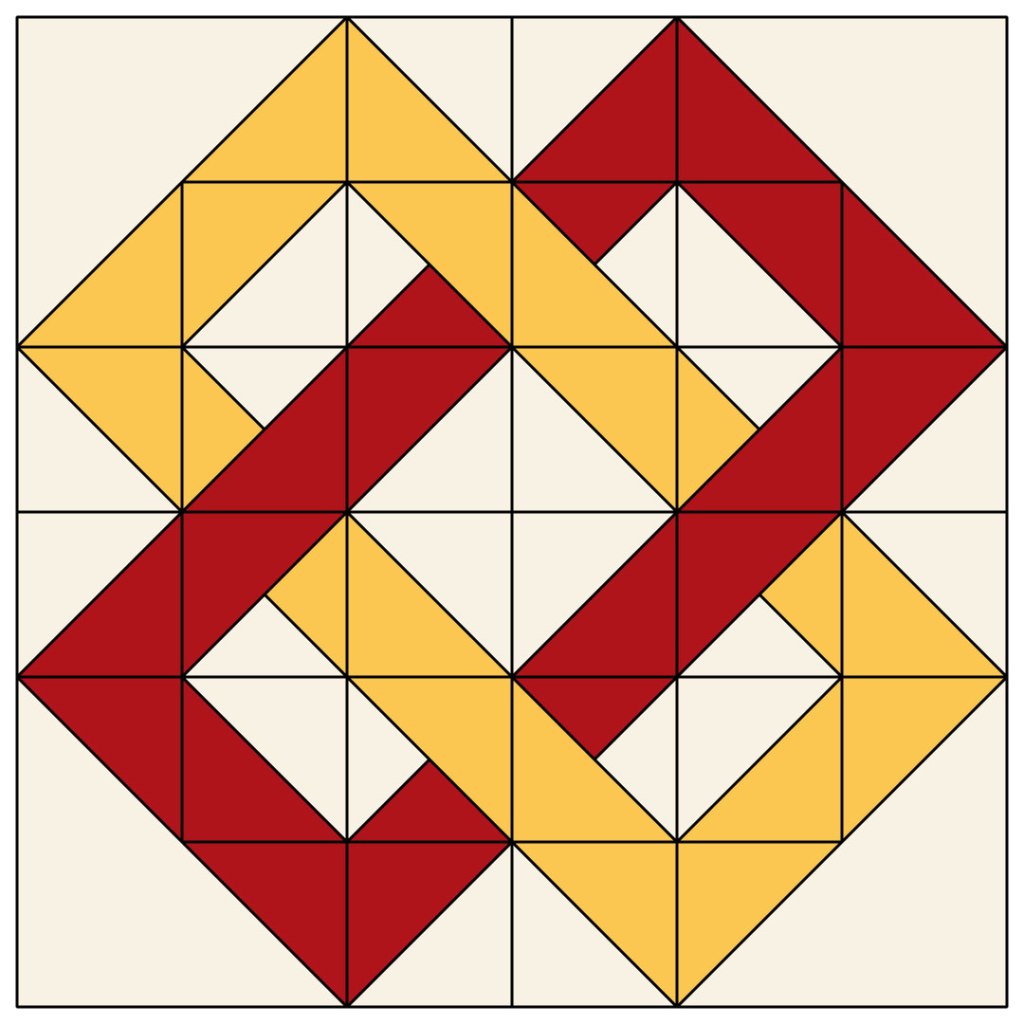
Step 8 – Complete: Your completed block should measure 12 1/2” x 12 1/2” square.



Leave a Reply